While game development requires good programming skills, not all developers are experts at it. It's mostly because developing good games needs more than technical or coding know-how. It also involves good math and logic skills, and requires more complex thinking than what's usually applied on traditional applications.
The canvas HTML element was first used by Apple in 2004. It has since evolved into one that allows the dynamic rendering of images and shapes (in 2D) with a JavaScript interface that can be used for drawing shapes on the canvas.
There are a lot of JavaScript game libraries that use canvas behind the scenes. In this article, I will present how to implement a simple game that can be played by two people on the same machine. The source code for the game is available on GitHub under the js_game_development repo.
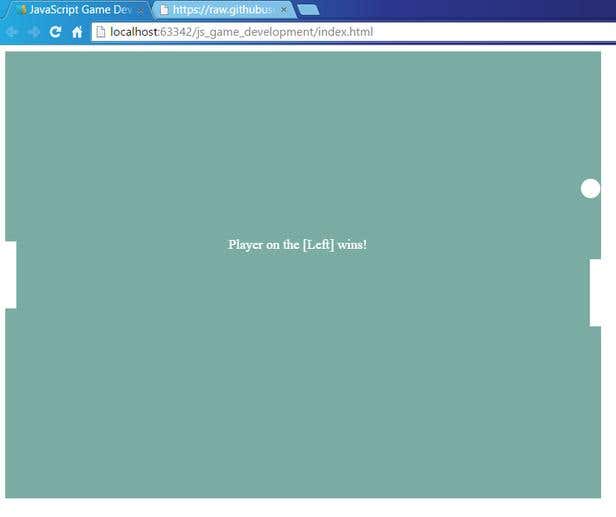
Below is an image of the game:

The game involves a ball and two paddles. The players can move the paddles up and down and the aim is to hit the ball with the paddle, and once the ball gets past the paddles, the game ends.
The left player can move the paddle up and down using the W and S keys on the keyboard, while the other player uses the arrow keys (up and down) to move the paddle on the right hand.
Game Components
When developing a game, there are three important things that need to be considered during the coding phase. First, the structure for the source code should be modularized. In general, the source code of a game is longer and more complex compared to other applications. Next, we should be attentive to all the ratios and constants used in the game, and these should be separated so they can be easily modified. Finally, each game has a so called "main loop" that draws the game environment, defines the game rules, sets up the events, and applies logic for moving objects around. The main loop has to be written in a way that is easily understandable and well structured.
The Game Field
The game field is a standard HTML canvas that sets its background color. We have this defined in the index.html file.
<!DOCTYPE html>
<html lang="en">
<head>
    <meta charset="UTF-8">
    <title>JavaScript Game Development</title>
    <link href="style.css" type="text/css" rel="stylesheet"/>
</head>
<body>

<canvas id="gameboard" width="800" height="600"></canvas>

<script src="constants.js" type="text/javascript"></script>
<script src="createGameEnvironment.js" type="text/javascript"></script>

</body>
</html>
The style.css is very simple and it only sets the background of the canvas.
canvas {
    background-color: #7baca4;
}
The Constants
In the constants.js file we have all the constants which are used in the game.
function Constants() {
    return {
        BALL_RADIUS: 13,
        PADDLE_HEIGHT: 90,
        PADDLE_WIDTH: 15,
        KEY_UP: 38,
        KEY_DOWN: 40,
        KEY_W: 87,
        KEY_S: 83,
        PADDLE_STEP: 8
    };
}
The Paddles
There are two paddles in the game, one for each player, located at opposing ends of the game field. The paddles are defined in the createGameEnvironment.js file.
var rightPaddleX = (gameCanvas.width - CONSTANTS.PADDLE_WIDTH);
var rightPaddleY = (gameCanvas.height - CONSTANTS.PADDLE_HEIGHT) / 2;
function addRightPaddle(ctx) {

    //handle key events
    if (rightUp && rightPaddleY > 0) {
        rightPaddleY -= CONSTANTS.PADDLE_STEP;
    } else if (rightDown && rightPaddleY < gameCanvas.height - CONSTANTS.PADDLE_HEIGHT) {
        rightPaddleY += CONSTANTS.PADDLE_STEP;
    }

    ctx.beginPath();
    //
    // draw the paddle
    //
    ctx.rect(rightPaddleX, rightPaddleY, CONSTANTS.PADDLE_WIDTH, CONSTANTS.PADDLE_HEIGHT);
    ctx.fillStyle = getColor(WHITE);
    ctx.fill();
    ctx.closePath();
}
Each paddle has a starting X and Y position, in the case of the right paddle, the X (rightPaddleX) coordinate is the width of the canvas minus the width of the paddle and the Y (rightPaddleY) coordinate is the center of the canvas. To draw a paddle, we need to have the gameCanvas, which loads the context:
var gameCanvas = document.getElementById('gameboard');
var context = gameCanvas.getContext('2d');
context.clearRect(0, 0, gameCanvas.width, gameCanvas.height);

addLeftPaddle(context);
addRightPaddle(context);
After setting up the game canvas (accessing the context and clearing it with the clearRect method) the paddles are drawn using the rect method of the context. The color of the paddle can be set using the fillStyle and fill methods.
ctx.beginPath();
    //
    // draw the paddle
    //
    ctx.rect(rightPaddleX, rightPaddleY, CONSTANTS.PADDLE_WIDTH, CONSTANTS.PADDLE_HEIGHT);
    ctx.fillStyle = getColor(WHITE);
    ctx.fill();
    ctx.closePath();
In the addRightPaddle method, we have key handling events too. We have the rightUp and rightDown flags, which signify which buttons were pressed on the keyboard.
//handle key events
    if (rightUp && rightPaddleY > 0) {
        rightPaddleY -= CONSTANTS.PADDLE_STEP;
    } else if (rightDown && rightPaddleY < gameCanvas.height - CONSTANTS.PADDLE_HEIGHT) {
        rightPaddleY += CONSTANTS.PADDLE_STEP;
    }
If the up key was pressed (to move the paddle up) we change the paddle’s Y position with the PADDLE_STEP constant. If the down key was pressed (to move the paddle down) then we increase the Y position of the paddle with the PADDLE_STEP constant.
The Ball
Besides the paddles, the ball is also a moving part in the game.
function drawBall(ctx, x, y, color) {
    if (ctx) {
        ctx.beginPath();
        ctx.arc(x, y, CONSTANTS.BALL_RADIUS, 0, 2 * Math.PI);
        ctx.fillStyle = color;
        ctx.fill();
        ctx.closePath();
    }
}
The ball is drawn using the arc method of the 2d canvas context. The method needs an X, Y positions and a radius, plus the starting angle of the arc (specified in radians) and the ending angle (also in radians).
The Main Loop
The main loop of the game is very important, because this defines the core logic of the game and here we can see how the game is built:
function mainLoop() {
    var context = gameCanvas.getContext('2d');
    context.clearRect(0, 0, gameCanvas.width, gameCanvas.height);

    addLeftPaddle(context);
    addRightPaddle(context);
    drawBall(context, x, y, getColor(WHITE));

    //right wall
    if (x + dx > gameCanvas.width - CONSTANTS.BALL_RADIUS) {
        // y should between the paddle y coordinate values
        if (y > rightPaddleY && y < rightPaddleY + CONSTANTS.PADDLE_HEIGHT) {
            dx = -dx;
        }
        else {
            drawPlayerWin(context, "Left");
            clearInterval(intervalHolder);
        }

    }
    // left wall
    else if (x + dx < CONSTANTS.BALL_RADIUS) {
        if (y > leftPaddleY && y < leftPaddleY + CONSTANTS.PADDLE_HEIGHT) {
            dx = -dx;
        }
        else {
            drawPlayerWin(context, "Right");
            clearInterval(intervalHolder);
        }
    }

    if (y + dy > gameCanvas.height - CONSTANTS.BALL_RADIUS) {
        dy = -dy;
    }
    else if (y + dy < CONSTANTS.BALL_RADIUS) {
        dy = -dy;
    }

    x += dx;
    y += dy;
}
First, we clear the context, meaning that we wipe out all the items on the canvas, add the left and right paddles, then draw the ball. Then comes the math part to detect if the ball has passed the left or the right paddles to determine which player won. The x and y are the coordinates of the ball while the dx and dy values are the values that change to simulate the ball’s movement.
For the right wall we have to check if the current X position of the ball plus the movement step is larger than the width of the canvas minus the width of the paddle. Then we check the Y coordinate—if the Y position of the ball is within the values of the paddle's top and bottom Y coordinates, then we change the direction (dx = -dx) of the ball. If the Y values are not within the paddle coordinates, it means the player on the right did not catch the ball and the player on the left has won the game. The logic is the same for the left wall, but of course with changing the values of the specific coordinates for the left paddle.
Next we have to handle how the ball bounces back from the top and bottom walls:
if (y + dy > gameCanvas.height - CONSTANTS.BALL_RADIUS) {
        dy = -dy;
    }
    else if (y + dy < CONSTANTS.BALL_RADIUS) {
        dy = -dy;
    }
Here, the logic is straightforward; if the current position of the ball plus the change of the movement is larger than the canvas height minus the ball radius, then we switch the direction (dy = -dy).
Running the Game
To run the game, all we need to do is open up the index.html file from a browser. The following code part schedules the main loop and sets the states for the game:
if (gameCanvas) {
    var context = gameCanvas.getContext('2d');

    if (context) {
        intervalHolder = setInterval(mainLoop, 15);
    }
}
else {
    console.error('Could not load the gameboard canvas.');
}
We use the setInterval method from JavaScript to schedule the execution of the main loop, which means that every 15 milliseconds, the mainLoop method is invoked and executed. Since this is executed 60+ times a second, the canvas will be redrawn 60+ times a second to create a sense of movement. Like when recording movies, each execution of the mainLoop is like a new frame within a video and because the canvas is redrawn 25+ times a second, our eyes interpret this as movement.
Building games is not an easy task, but the canvas element provides a good base for creating a game as a hobby. There are many other JavaScript frameworks for game development, like CraftyJS or Three.js—a bigger list can be found on html5gameengine.com.
This article only covers a minor part of game development—how to implement motion and control—but a lot more needs to be done to complete this game. To create a fairly usable game from this idea, a developer would need to create sprites for the canvas and the ball, set a nice background image for the game environment, design pop-ups for displaying information, implementing a counter for the score, or asking for the names of the players before starting the game.